


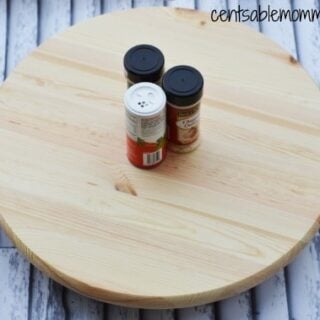
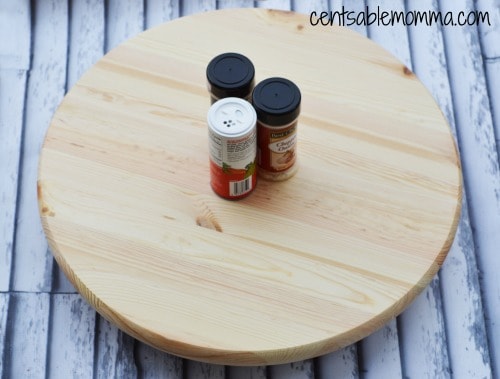
If you're tired of constantly passing the salt and pepper or butter around the table, you'll love this DIY Lazy Susan tutorial. The only tool you need is a drill (and some precut wood pieces) to create this project, and you can spin your condiments around the center of the table.
It's perfect as a gift or just for practical usage for yourself.
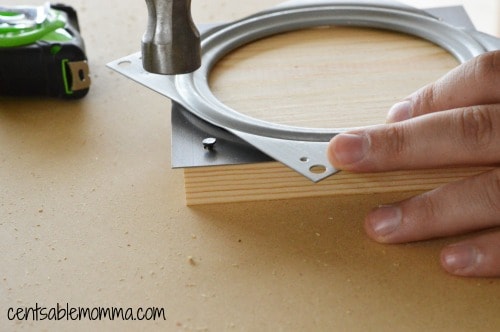
Begin by placing your 6-inch piece of board on the smallest spinning portion of the Lazy Susan (the spinning metal piece). There should be pre-made holes in it so use your 4 tacks to secure it.
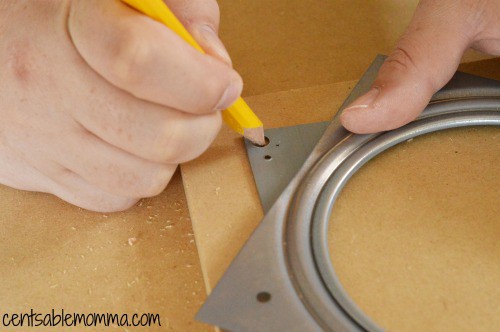
Next, place the metal piece on top of the 8-inch piece of board and mark where the screw holes are with a pencil.
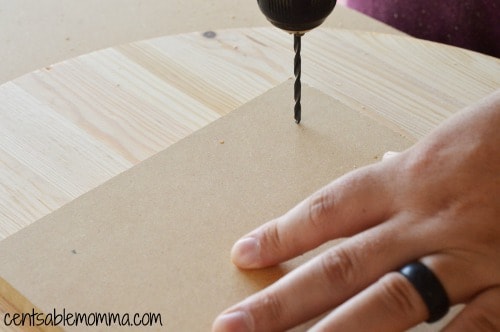
Pre-drill your screw holes so your wood will not split.
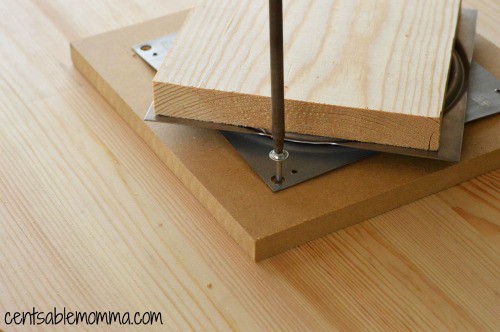
Then, place the lazy Susan back on top of the 8-inch board, with the 8-inch piece of board resting directly in the middle of the back of the round piece of pine. Secure it all together with the 4 1 ½ inch screws.
DIY Lazy Susan
Have you ever thought of buying a Lazy Susan to make dinnertime easier? Don't buy one...but make one with this easy DIY Lazy Susan Tutorial. You don't need any special skills and the only tool you need is a drill.
Materials
- Round Piece of Pine Board (Most lumber stores have them)
- 4 - ⅝” Nail Tacks
- 4 - 1 ½ Inch Screws
- Lazy Susan Metal Part (Sold at most hardware stores)
- 8x8” Piece of Board
- 6x6” Piece of Board
Tools
- Drill (9/64th standard drill bit)
Instructions
- Begin by placing your 6-inch piece of board on the smallest spinning portion of the Lazy Susan (the spinning metal piece).
- There should be pre-made holes in it so use your 4 tacks to secure it.
- Next, place the metal piece on top of the 8-inch piece of board and mark where the screw holes are with a pencil.
- Pre-drill your screw holes so your wood will not split.
- Then place the lazy Susan back on top of the 8-inch board, with the 8-inch piece of board resting directly in the middle of the back of the round piece of pine.
- Secure it all together with your 4 1 ½ inch screws.
Notes
Your lazy Susan metal part may differ in size than the one we use. We used a square 6-inch one. If yours is a different size, you made need to adjust the size of the two underneath pieces of wood accordingly.


Leave a Reply